Notary와 DCT를 사용해서 Private Registry에 서명된 Trust Image Push 하기
[Container image 인증 관련 글 목록]
Docker Notary : Docker Content Trust (DCT)
DCT를 사용해서 Dcoker Hub에 서명된 Trust Image Push 하기
Notary와 DCT를 사용해서 Private Registry에 서명된 Trust Image Push하기
개인 인증서를 사용해서 Notary Service 구동
kubernetes image인증 - Portieris
Notary Service 구축
테스트 및 개발용 Notary Service를 운영하는 가장 빠른 방법은
Notary project에서 Docker compose 파일을 사용하는 것.
바이너리 또는 Docker image를 받을 수 있음
- https://github.com/theupdateframework/notary/releases/
- https://github.com/theupdateframework/notary.git
Notary Service 설치
[명령어]
(1) git clone https://github.com/theupdateframework/notary.git
(2) cd notary
(3) docker-compose up

docker-compose up 하면
Notary Server와 Notary Signer image를 빌드하고,
Notary Server 및 Signer와 이들이 공유하는 MySQL DB에 대한 컨테이너를 동작시킴.
MySQL 데이터는 볼륨에 저장됨.
Notary Server와 Signer는 인증받은 TLS를 통해 상호 통신하고
Notary Server는 HTTPS 트래픽을 4443 포트로 listen함.
[docker-compose up 성공 시 결과]
Notary Service 설치 확인
콘솔창을 하나 더 열어서
[docker images 확인]
명령어 : docker images
[docker container 확인]
명령어 : docker ps
[container 내 프로세스 확인]
명령어 : docker-compose top
[포트 확인]
명령어 : netstat -anpt | grep 4443

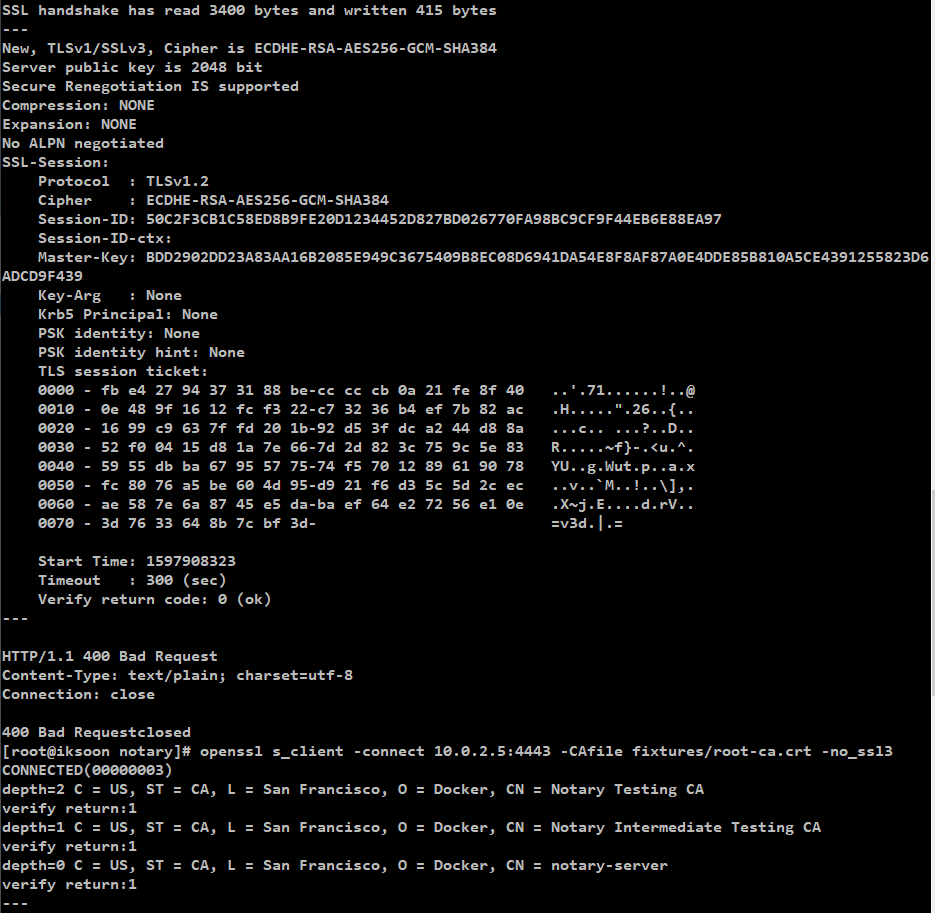
[OpenSSL 테스트]
명령어 : openssl s_client -connect 10.0.2.5:4443 -CAfile fixtures/root-ca.crt -no_ssl3

Docker Private Registry 에 Notary 연동
[환경]
IP : 10.0.2.5
Private Registry
Notary Service
모두 같은 서버에 설치된 상태
test도 동일한 server에서 진행.
DCT Enable 설정
export DOCKER_CONTENT_TRUST=1
DCT 가 Enable 된 상태에서 Private Registry 에 Push 해보기
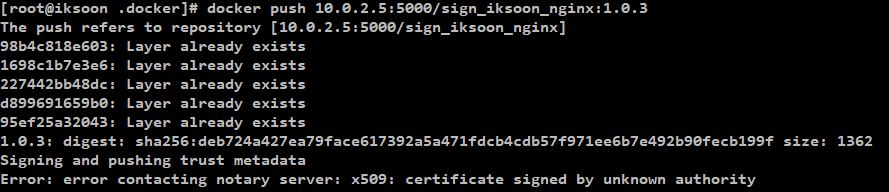
Docker Private Registry 에 이미지를 Push 하기
오류가 발생하면서 인증이 안된상태로 image 가 push 됨.
오류명 : Error contacting notary server: x509
해결책으로 Notary Server를 바라볼 수 있도록 설정해줘야함
Notary Server 바라보도록 설정하기
상위에서
git clone https://github.com/theupdateframework/notary.git
했었던 경로의 ~/notary 디렉토리에서
[명령어]
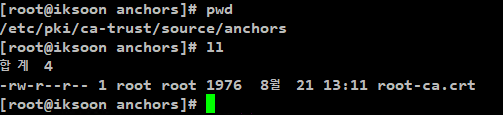
cp fixtures/root-ca.crt /etc/pki/ca-trust/source/anchors/
실행.

[명령어]
(1) update-ca-trust
(2) export DOCKER_CONTENT_TRUST_SERVER=https://notary-server:4443
(3) vi /etc/hosts 에서
127.0.0.1 notary-server 추가
설정 완료 후 image Push
설정 완료 후 다시 image Push 해보기
[명령어]
(1) docker tag [Push 대상 image] [Private Registry IP] : [Port]/[image name] : [tag (version)]
(2) docker push [생성한 tag]
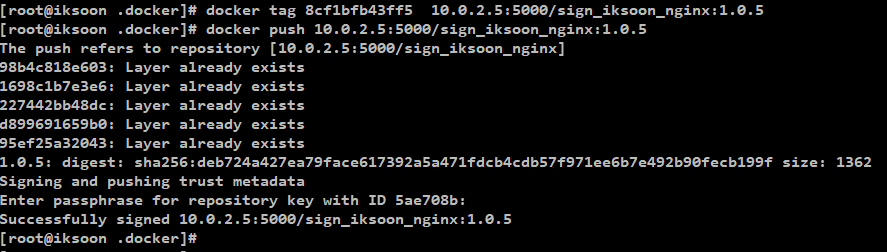
다시 push 해보면 정상적으로 Notary Server와 연결되어 인증을 수행함.
처음으로 Private Registry로 Push 하면 root key를 생성함.
여기서의 Root Key는 Notary에서 설명했던 Root Key를 의미함
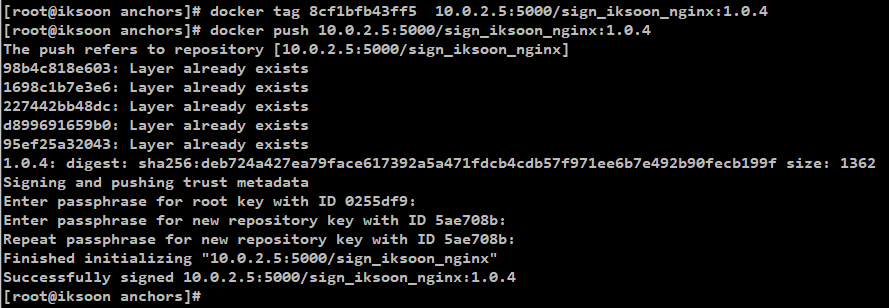
한번 최초로 생성한 이후로는 처음 생성한 password를 계속 사용하게 됨.
생성한 키 확인
개인키가 생성되는 default 경로 : /root/.docker/trust/private
확인해보면
10.0.2.5:5000 registry 에 대한 Target 키가 생성되어있음
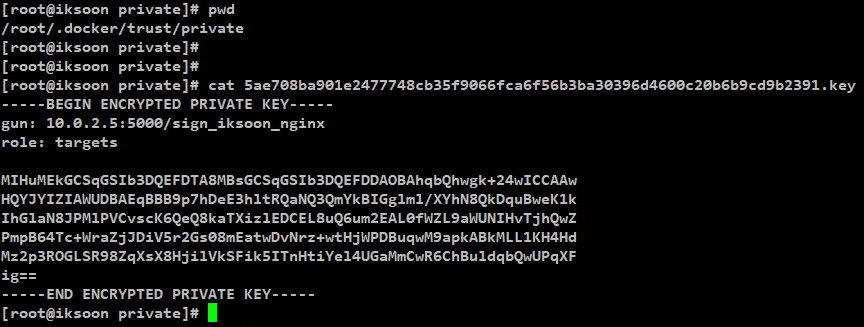
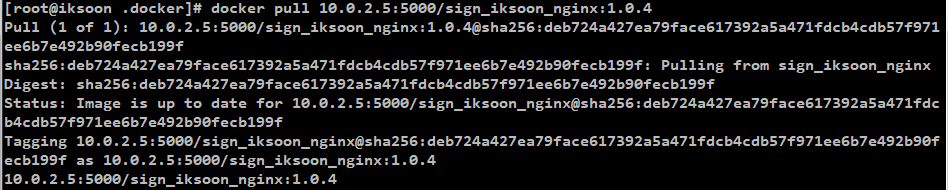
Image Pull
image Pull 해보기
인증 안된건 다운 안됨

인증된 image는 Pull 됨.
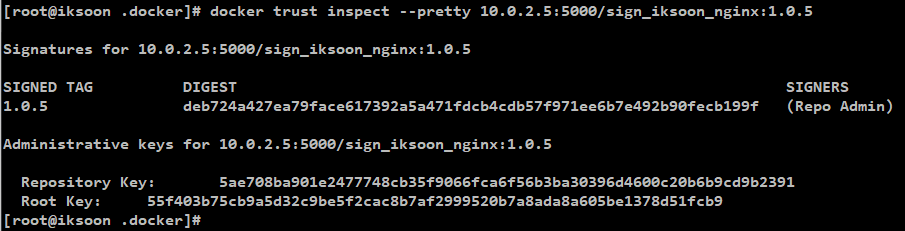
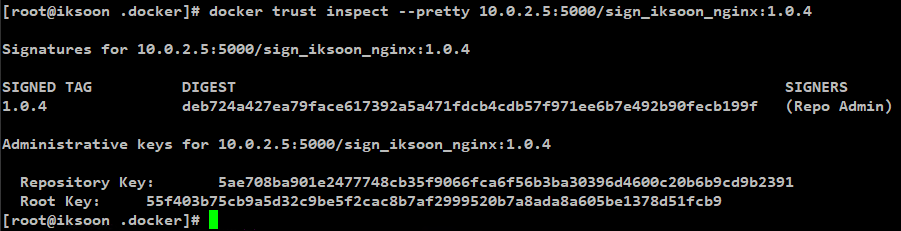
Docker Hub에 있는 Image의 상세 내용 조회
[명령어]
docker trust inspect --pretty docker.io/[docker hub id]/[image name]
서명이 되어있는 image의 경우 아래와 같이
Image의 SIGNERS(서명자)가 해당 Repository의 관리자라고 나오는 것을 확인할 수 있고
Repository Key와 Root Key 정보를 확인할 수 있음
제 글을 복사할 시 출처를 명시해주세요.
글에 오타, 오류가 있다면 댓글로 알려주세요! 바로 수정하겠습니다!
참고
[Private registry DCT]
https://docs.docker.com/notary/
'클라우드 > Docker' 카테고리의 다른 글
| 15. Docker 구조 (0) | 2021.10.20 |
|---|---|
| 14. 개인 인증서를 사용해서 Notary Service 구동 (0) | 2020.11.08 |
| 12. DCT를 사용해서 Docker Hub에 서명된 Trust Image Push 하기 (0) | 2020.11.08 |
| 11. Docker Notary : Docker Content Trust ( DCT ) (3) | 2020.11.08 |
| 10. Notary Service 란? (0) | 2020.11.08 |