1. GCP SDK, API라이브러리 download 방법
준비 : python2 or 3 설정 완료
1.1. Google SDK 설치
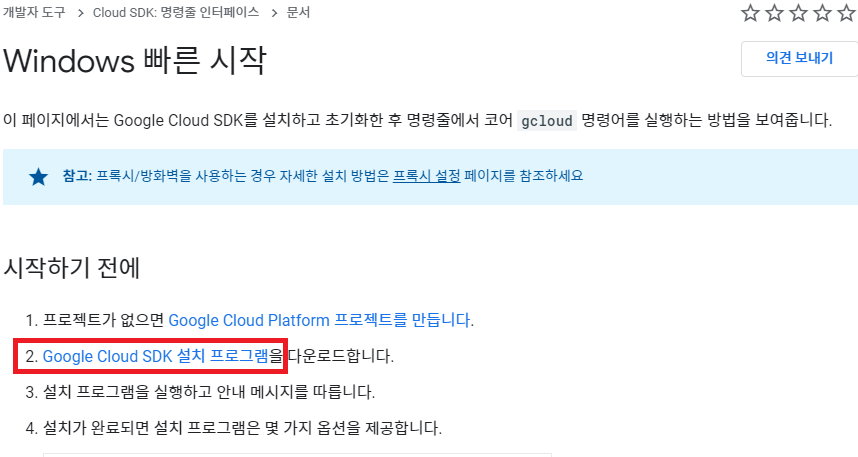
1.1.1. Google SDK download
dowload 링크 : https://cloud.google.com/sdk/docs/quickstart-windows
결국 이 상위링크가 하라는데로 하면 됨
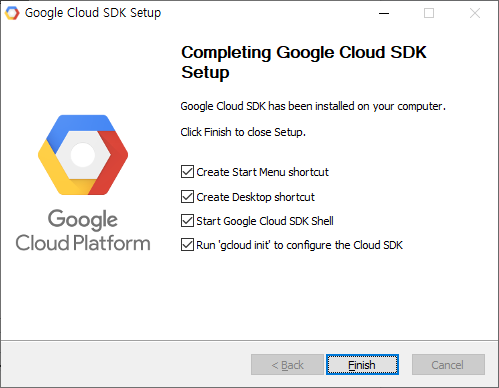
설치 완료
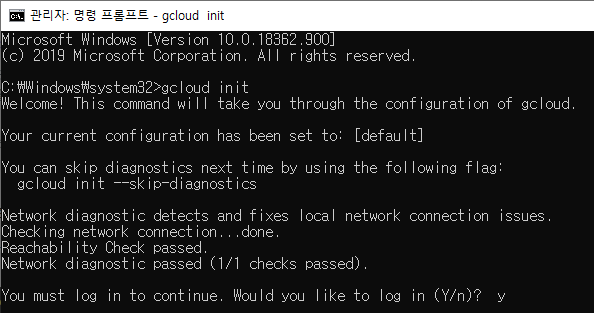
1.1.2. cmd 관리자 권한 실행
1.1.3. gcloud init 명령 실행
y 입력
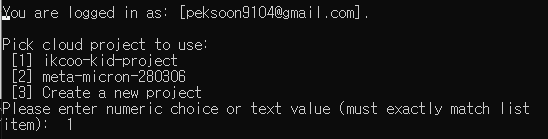
1.1.4. 계정 선택 후 인증과정 진행
완료 상태

1.1.5. 사용할 프로젝트 선택
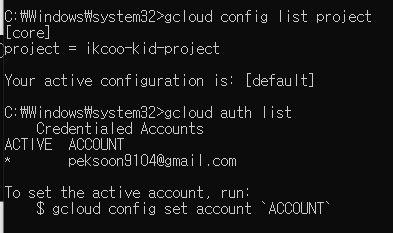
1.1.6. 인증 확인
gcloud config list project
gcloud auth list
상위 2가지 명령 수행해서 아래와 같이 나와야지 인증 성공
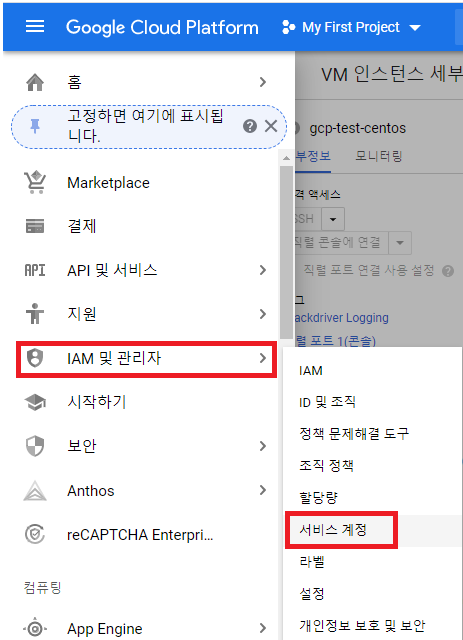
2. 서비스 계정 키 발급
2.1. GCP에서 IAM 및 관리자 > 서비스 계정으로 이동
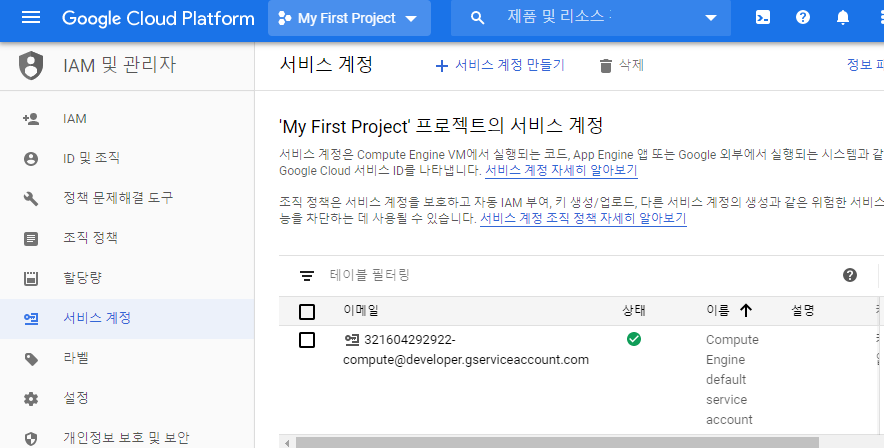
2.1.1. 이동 후 확인해 보면 기본적으로 Engine 관련한 서비스 계정이 기본적으로 생성되어있음
2.1.2. api 를 사용하기 위해 별도의 계정을 생성해줘야함
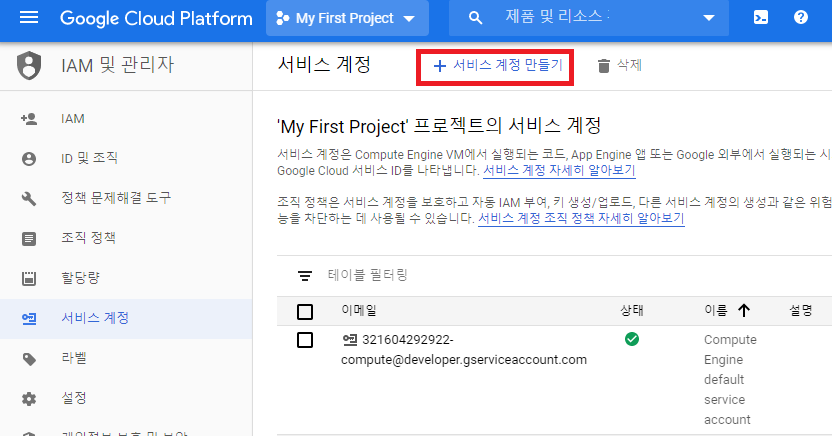
2-2. 계정 생성
2.2.1. 상단의 +서비스 계정 만들기 클릭
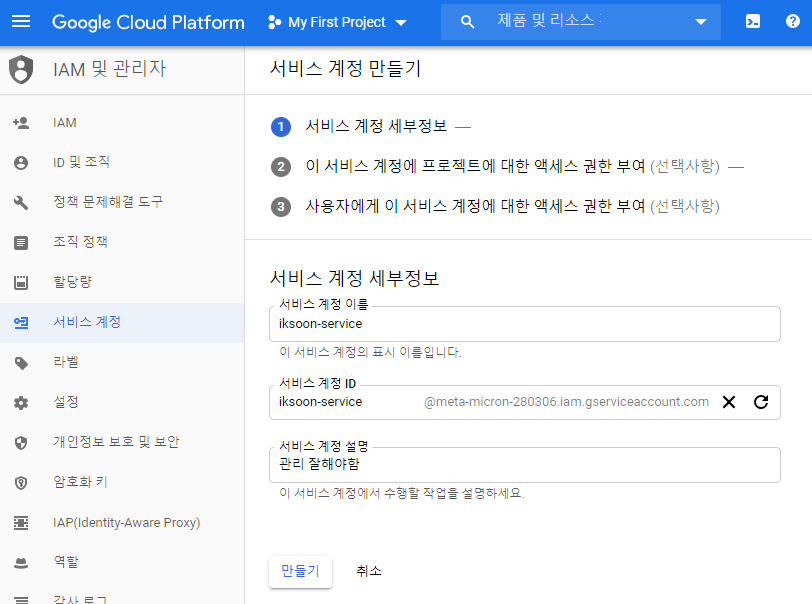
2.2.2. 서비스 계정 이름, 계정 ID 를 넣어주고 만들기 클릭
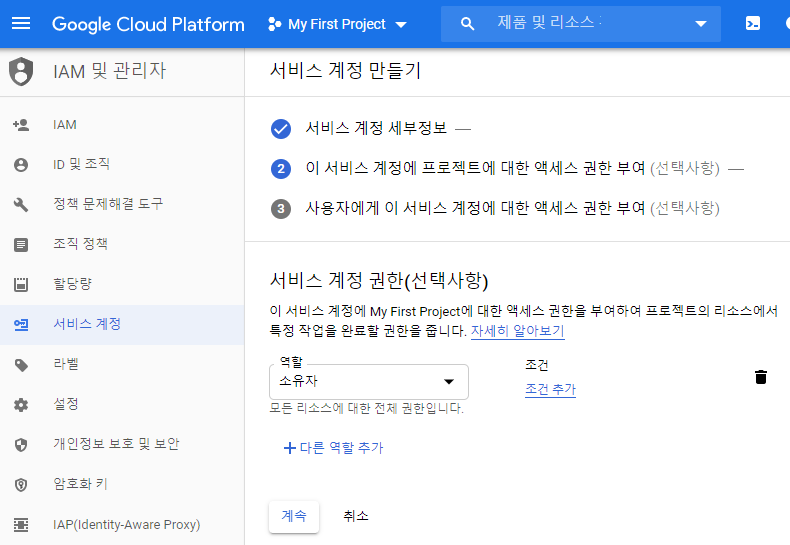
2.2.3. admin 으로 생성하기 위해 소유자 (Owner) 설정
모든 권한이 있기 때문에 털리면 망함.
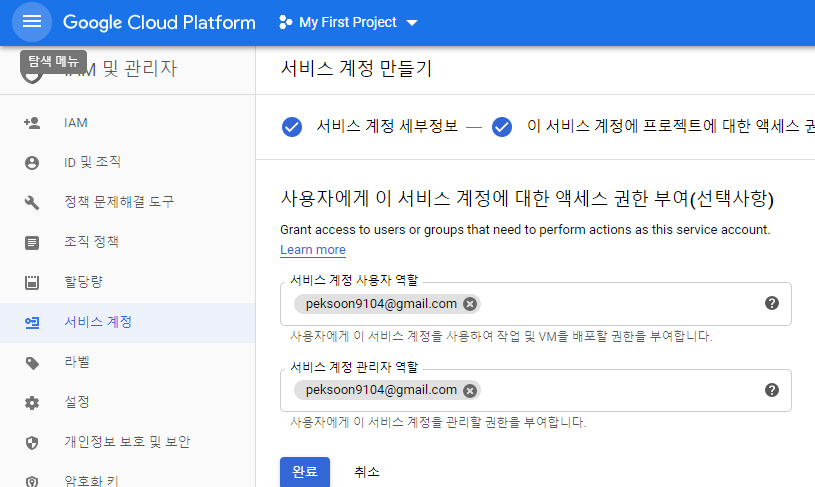
서비스 계정 사용자 역할 : 이 계정 사용가능한 유저
서비스 계정 관리자 역할 : 이 계정 관리 할 유저
입력 안해도 됨
2.2.4. 설정 후 완료 클릭
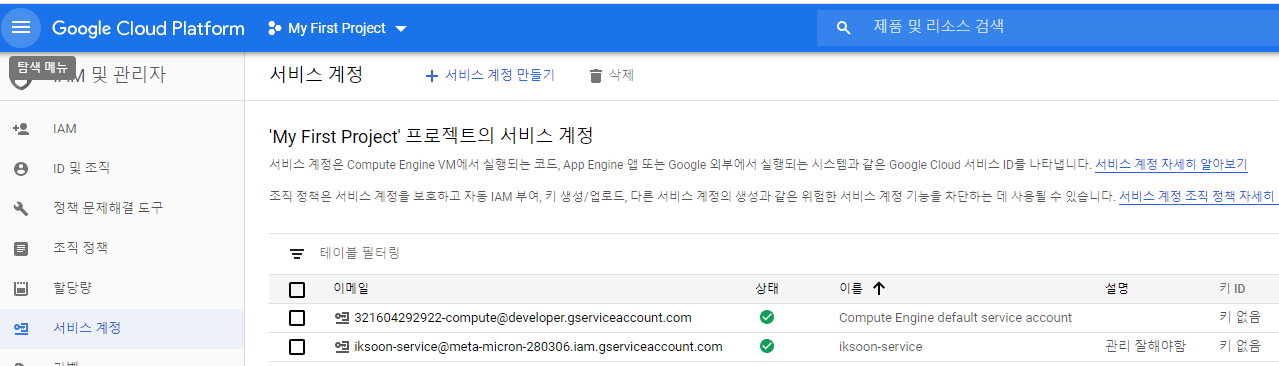
정상적으로 서비스 계정이 생성되면 위와같이 확인 가능
2-3. 키 생성
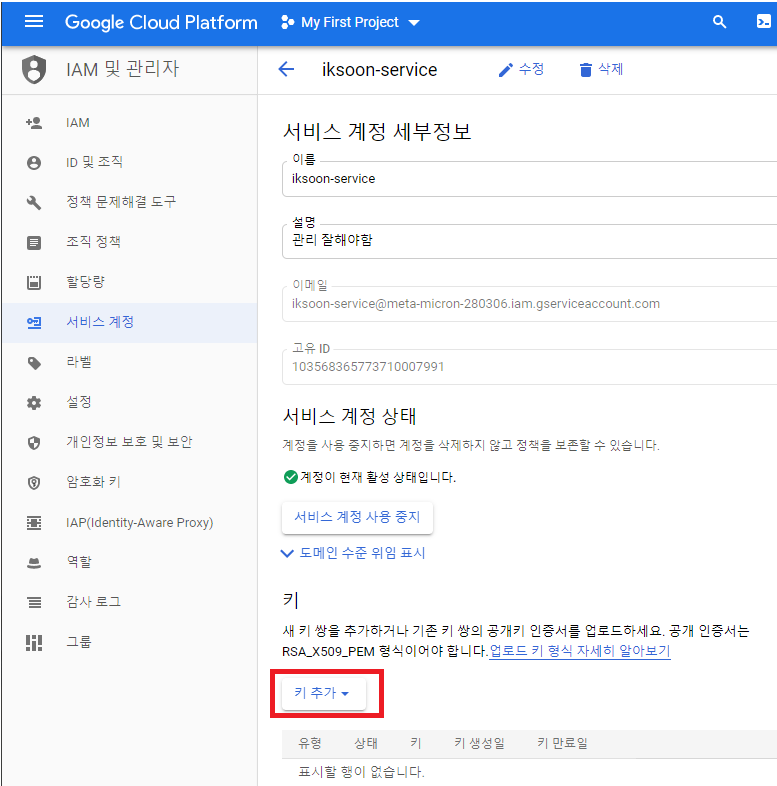
2.3.1. 상위에서 생성한 계정을 클릭
2.3.2. 키 추가 클릭
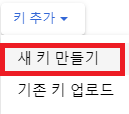
2.3.3. 새 키 만들기 클릭
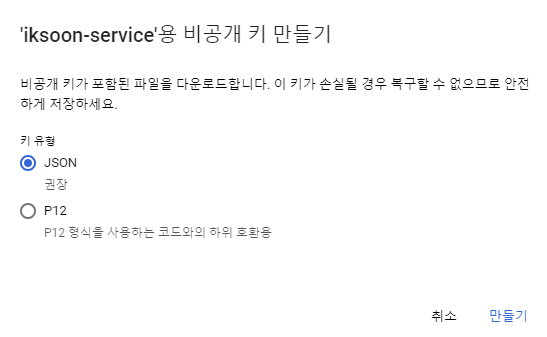
2.3.4. JSON 선택 후 만들기
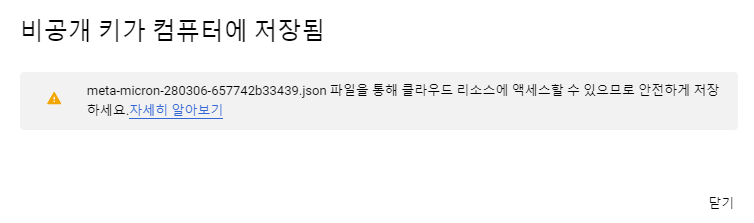
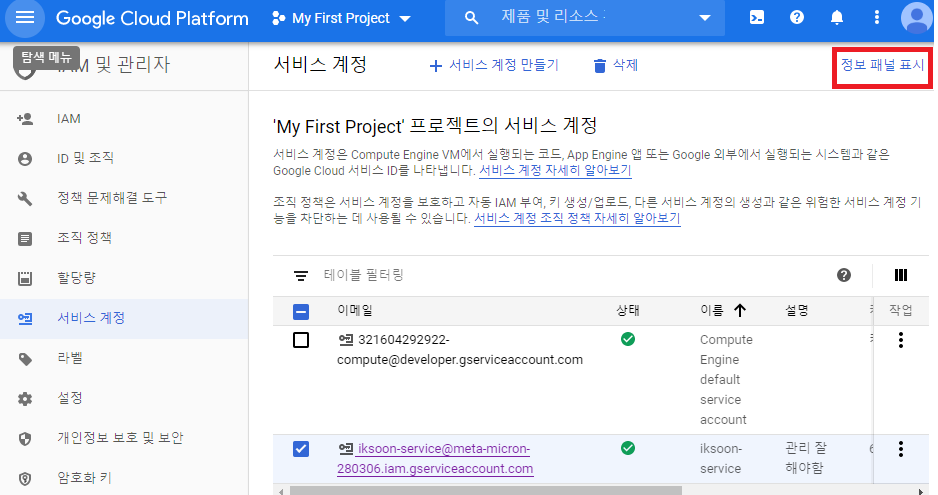
2.3.5. key 가 download 됨. 닫기 클릭
2.3.6. 권한 확인. 정보 패널 표시 클릭
2.3.7. 상속된 권한 표시 후 소유자에 상위에서 설정한 계정이 정상적으로 들어가 있는지 확인
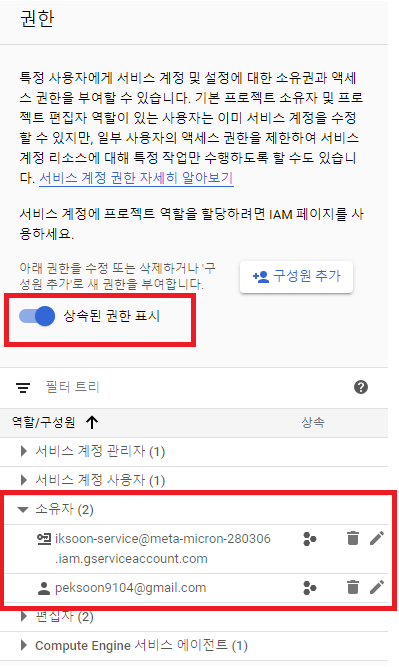
완료.
3. 서비스 계정 키 연결
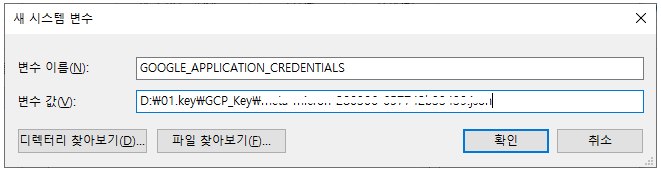
3.1. 환경 변수 설정
환경 변수 이름 : GOOGLE_APPLICATION_CREDENTIALS
경로 : 상위 2-3.5) 과정에서 download 한 key의 경로를 넣어줌
키 파일 이름까지 넣어줌
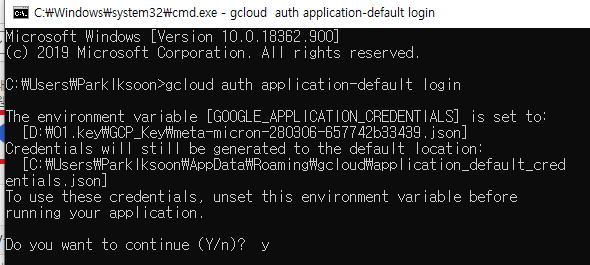
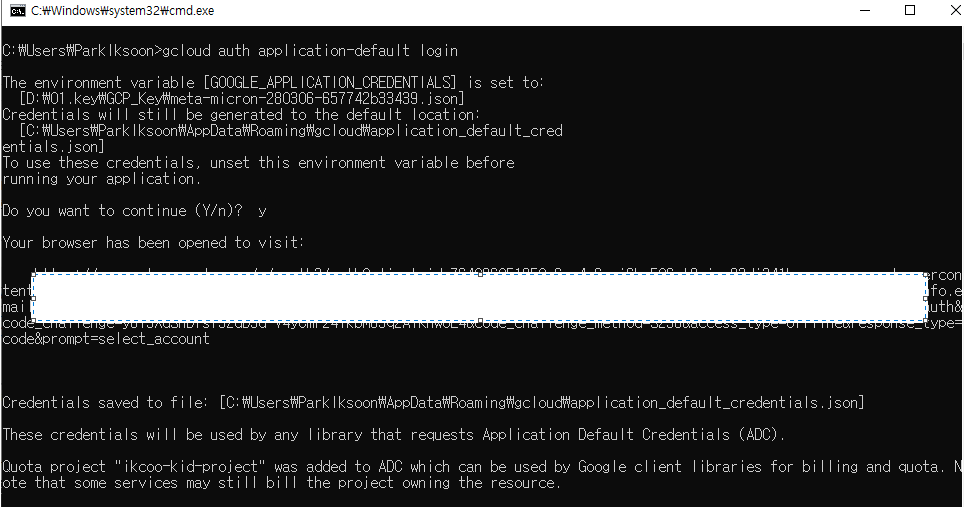
3.2. cmd에서 gcloud auth application-default login 명령 수행
명령여 : gcloud auth application-default login
2번째 : y
3.3. 웹페이지가 뜨면 login
loin 후 인증 성공 시
3.4. 인증 완료 후 토큰 조회
명령어 : gcloud auth application-default print-access-token
토큰이 조회되면 키 사용준비 완료

완료.
4. GCP API 라이브러리 download
준비 : python2 or 3 설정 완료
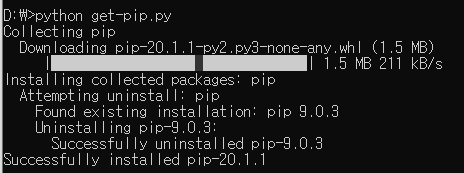
4.1. (pip 설치) 사이트에서 get-pip.py 다운
site : https://bootstrap.pypa.io/
4.2. cmd 창에서 명령어 실행
python get-pip.py
설치 완료 되면
%python_home%\Scipts 폴더에 pip 확인가능
4.3. cmd 창에서 명령어 실행
pip install google-api-python-client
pip install oauth2client
설치 완료 되면
%python_home%\Lib\site-packages 폴더에서 확인가능
4.4. 라이브러리 설치 확인
pip show google-api-python-client
pip show oauth2client
5. GCP python APi
project = '프로젝트 ID' 값을 알아야함
zone = '지역 (리전)' 값을 알아야함
5.1. project id
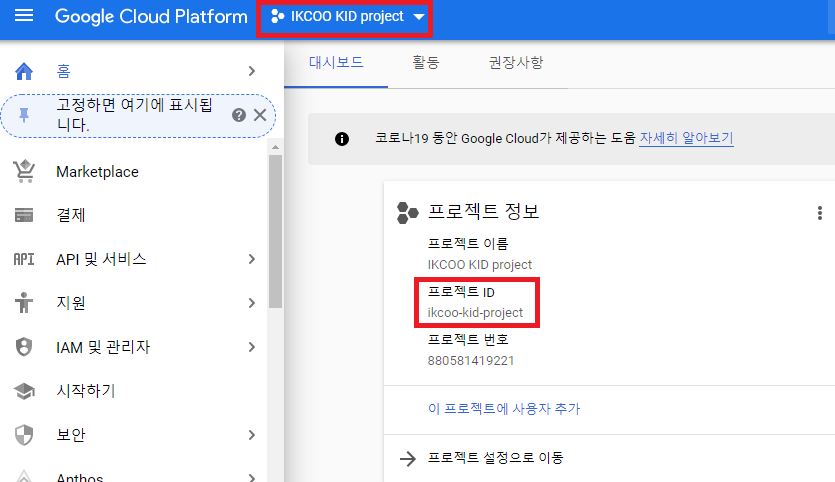
5.1.1. GCP HOME 에서 상단의 첫번째 빨간 박스를 클릭
상위 1-5. 사용할 프로젝트 선택
단계에서 정했던 project 를 선택
5.1.2. 프로젝트 정보에서 프로젝트 ID 확인
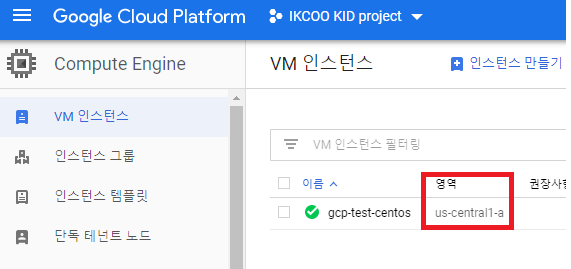
5.2. zone
5.2.1. GCP HOME > Compute Engine > VM 인스턴스
5.2.2. 생성되어져 있는 VM 의 영역에 해당하는 값.
파이썬 예제코드
|
from googleapiclient import discovery from oauth2client.client import GoogleCredentials
# Project ID for this request. projectID = 'ikcoo-kid-project'
# The name of the zone for this request. zoneID = 'us-central1-a'
def get_zones_in_project(compute, max_results=None):
# GCP 의 경우 list 조회 시 zone 을 명시해야해서 모든 zone 에 있는 instance 를 조회하기 위해 # 모든 zone list 를 조회 함
req = compute.zones().list(project=projectID, maxResults=max_results) res = req.execute() return res['items']
def GCP_VM(num):
credentials = GoogleCredentials.get_application_default() compute = discovery.build('compute', 'v1', credentials=credentials)
zones = get_zones_in_project(compute)
## GCP VM Instances List ## if num == 0: print('[Azure VM Instances List]') VmCount= 0
for zone in zones: request = compute.instances().list(project=projectID, zone=zone['name']) #print(zone['name']) while request is not None: response = request.execute()
if 'items' in response: for instance in response['items']: VmCount+=1 print("[{0}] id=({1}), name=({2}), state=({3}), zone=({4})".format(str(VmCount), instance['id'], instance['name'], instance['status'], zone['name'])) #end for request = compute.instances().list_next(previous_request=request, previous_response=response) #end if #end while #end for #end if
## GCP VM Instances List Target Zone## if num == 1: print('[Azure VM Instances List (Target Zone={0})]'.format(zoneID)) VmCount= 0 request = compute.instances().list(project=projectID, zone=zoneID)
while request is not None: response = request.execute()
if 'items' in response: for instance in response['items']: VmCount+=1 print("[{0}] id=({1}), name=({2}), state=({3}), zone=({4})".format(str(VmCount), instance['id'], instance['name'], instance['status'], zoneID)) #end for request = compute.instances().list_next(previous_request=request, previous_response=response) #end if #end while #end if
## GCP VM Instances List Target Zone Start## if num == 2: print('[Azure VM Instances List Start(Target Zone={0})]'.format(zoneID)) request = compute.instances().list(project=projectID, zone=zoneID)
while request is not None: response = request.execute()
if 'items' in response: for instance in response['items']: if 'TERMINATED'== instance['status']: startRequest = compute.instances().start(project=projectID, zone=zoneID, instance=instance['id']) startRequest.execute() print("id=({0}), name=({1}), zone=({2}) START".format(instance['id'], instance['name'], zoneID)) #end for request = compute.instances().list_next(previous_request=request, previous_response=response) #end if #end while #end if
## GCP VM Instances List Target Zone Stop## if num == 3: print('[Azure VM Instances List STOP(Target Zone={0})]'.format(zoneID)) request = compute.instances().list(project=projectID, zone=zoneID)
while request is not None: response = request.execute()
if 'items' in response: for instance in response['items']: if 'RUNNING'== instance['status']: stopRequest = compute.instances().stop(project=projectID, zone=zoneID, instance=instance['id']) stopRequest.execute() print("id=({0}), name=({1}), zone=({2}) STOP".format(instance['id'], instance['name'], zoneID)) #end for request = compute.instances().list_next(previous_request=request, previous_response=response) #end if #end while #end if
#end def GCP_VM
if __name__=="__main__" :
while True: InputGet = input('cli> ') if 'q' == InputGet : break if '0' == InputGet : GCP_VM(0) if '1' == InputGet : GCP_VM(1) if '2' == InputGet : GCP_VM(2) if '3' == InputGet : GCP_VM(3) |
제 글을 복사할 시 출처를 명시해주세요.
글에 오타, 오류가 있다면 댓글로 알려주세요! 바로 수정하겠습니다!
참고
[GCP 라이브러리]
SDK : https://cloud.google.com/sdk/docs/
https://cloud.google.com/python/docs/reference?hl=ko
http://googleapis.github.io/google-api-python-client/docs/epy/index.html
https://cloud.google.com/sdk/gcloud/reference/compute/instances/list
https://gist.github.com/pydevops/cffbd3c694d599c6ca18342d3625af97
[개발 참고]
https://turtle1000.tistory.com/77?category=896267
https://cloud.google.com/compute/docs/reference/rest/v1/instances/list
https://github.com/lyft/cartography/blob/master/cartography/intel/gcp/compute.py
[SDK 설치]
https://cloud.google.com/sdk/docs/quickstart-windows
[인증 참고
https://cloud.google.com/docs/authentication/production#auth-cloud-compute-engine-python